How to Draw a Plumb Blossom Easy
This tutorial shows how to draw and shade a realistic looking plum. It includes a total of six steps with pencil drawing examples for each.
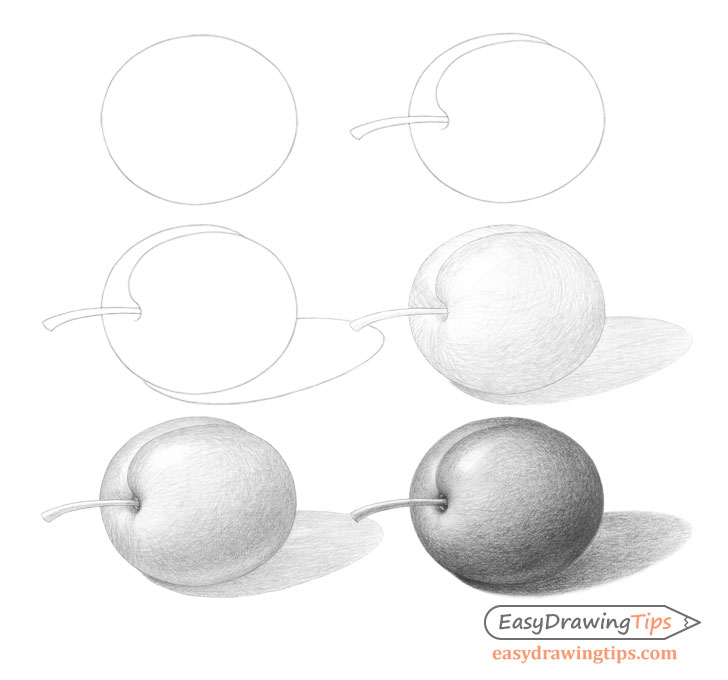
This tutorial can be split into two parts the line drawing and the shading. The line drawing portion is very easy with the shading being a bit more complex but still fairly beginner friendly.
Be sure to make very light strokes for the line drawing portion as you will want them to seamlessly blend into the shading. Some of the examples have darker strokes simply to make them easier for you to see.
Step 1 – Draw an Outline of the Plum
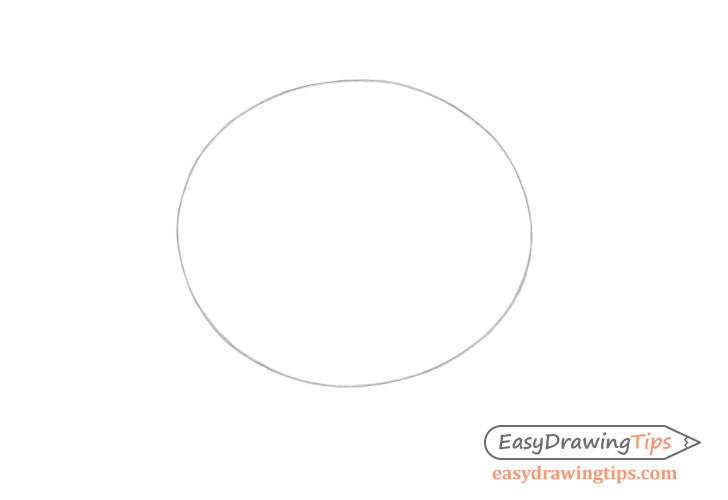
Make a simple outline drawing of the main shape of the plum. In this case it should basically be just an oval.
Step 2 – Draw the Details
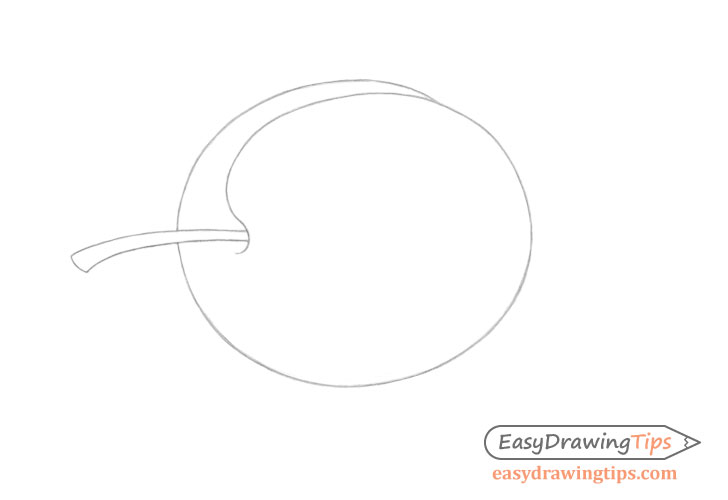
Draw the smaller details such as the stem and the characteristic split that plums tend to have. It's important to note that the area the stem grows from is sort of indented and that the split transitions into to it.
Step 3 – Outline the Shadow
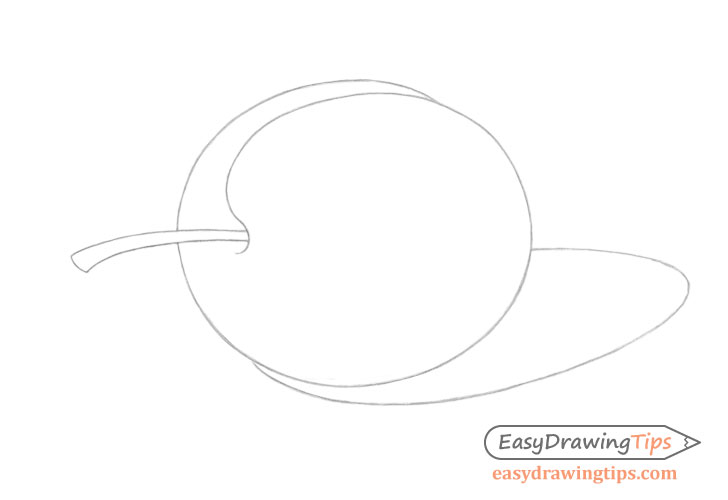
Outline the shape of the shadow the plum will cast on the surface it's sitting on. The shadow will be opposite the main light source which in this case is coming from the top left area of the drawing and also slightly to the front of the plum. This means the shadow will be to the right and slightly behind it.
Step 4 – Determine Light/Dark Ares & Stroke Directions
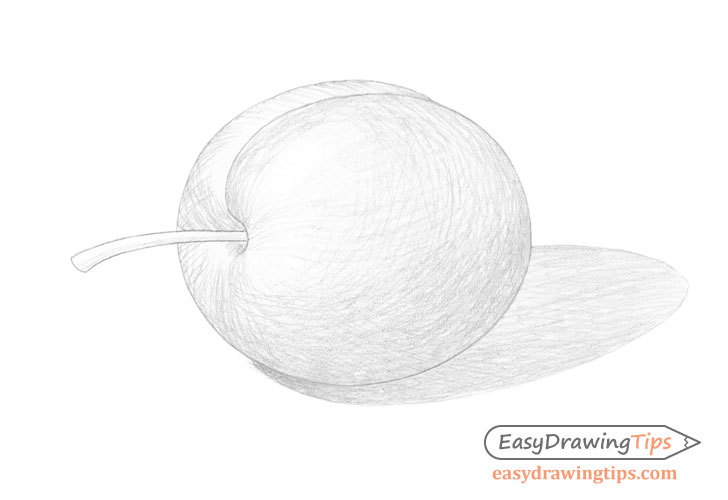
Before starting the actual shading it's a good idea to take a closer look at how light and dark areas will be distributed throughout the surface of the plum.
General Light and Dark Distribution
The lightest area of the plum (in the lighting conditions described earlier) will be near it's upper left (lit up by the main light source). The plum will gradually get darker toward the bottom right but will also have a small light area near the very bottom created by the main light source reflecting from the surface it's positioned on. Overall the area illuminated by the reflected light should still be shaded significantly darker than the area illuminated by the main light source.
Split Area
The front curve of the split in the plum will get slightly darker towards it's upper end as that is where it starts curving away form the main light source. The back curve (farther away from the viewer) will be light towards the bottom and will again get slightly darker near the top.
Shadow Area
The shadow the plum casts will be darker towards it's base and will get lighter as it moves further away from the plum.
Stroke Directions
Making strokes in a way that reinforces the shape of an object can help make it look more three dimensional. When shading the plum make the strokes slightly curved and apply the them in a way where they sort of wrap around it (as shown in the example above). You can make straight strokes for the shadow.
Apply more sets of strokes on a slightly angle to the previous set to create a curved crosshatch
For an explanation of different stroke types and shading methods see:
Shading Techniques and Stroke Types Drawing Tutorial
Step 5 – Darken the Shading
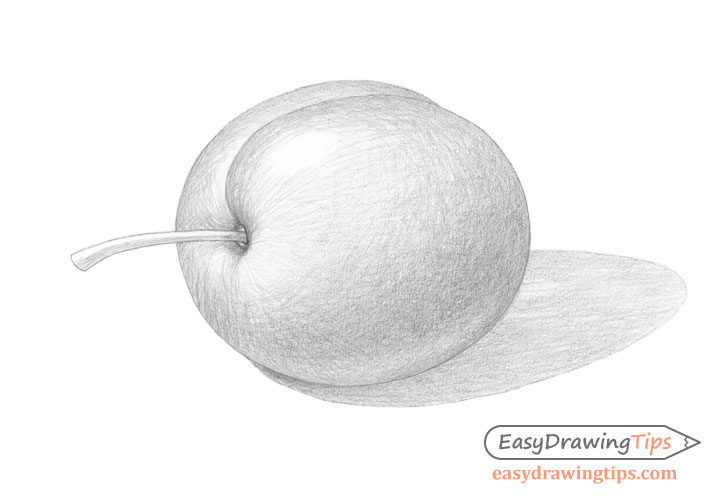
Apply even more sets of strokes to darken the "in shadow" areas and to create a more even overall distribution of them (no big gaps). Try and keep all of the strokes in roughly the same direction as the original set or the second set that creates the crosshatch.
Step 6 – Finish the Plum Drawing
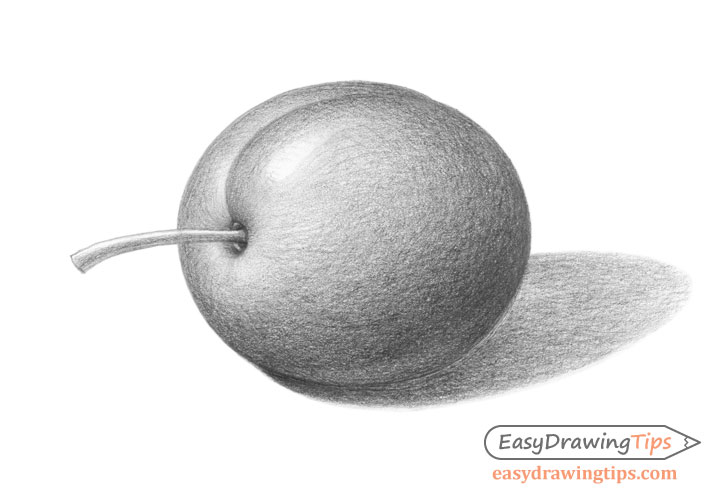
Finish the shading by applying even more layers of strokes where needed to smooth out the transitions between the light and dark areas of the plum. As the plum has a smooth surface you will want to have smooth gradients. At the same time try not to fully blend all of the strokes together to where they become invisible. As mentioned earlier the direction of the strokes helps emphasize the shape of the object.
Finally also keep in mind that as the plum has a dark surface it should have fairly dark overall shading when compared to a lighter object.
Conclusion
This is a fairly detailed tutorial on drawing and shading a plum. If you are a beginner looking to learn pencil shading it should have given you some good practice.
For more similar tutorials also see:
- Egg Step by Step Basic Shading Tutorial
- How to Shade Basic 3D Shapes Tutorial
- How to Draw a Realistic Pear Tutorial
- How to Draw Nuts Step by Step
- How to Draw Cherries Step by Step
Source: https://www.easydrawingtips.com/how-to-draw-a-plum-step-by-step/
0 Response to "How to Draw a Plumb Blossom Easy"
Post a Comment